

How to Bleed Avid Brakes Like a Pro
How to Bleed Avid Brakes Like a Pro
We've all read the horror stories on the forums about how impossible it is to get a decent bleed on a set of Avid brakes. Complaints usually centre around the 'over complicated' bleed procedure (which isn't really all that complicated. Is it?)
I can't say I've had the same bad experiences. Maybe I just haven't bled enough sets.
This detailed guide aims to debunk the impossible-to-bleed theory and help you make your Avid brakes feel brand new again. Let's take a look at what's involved.
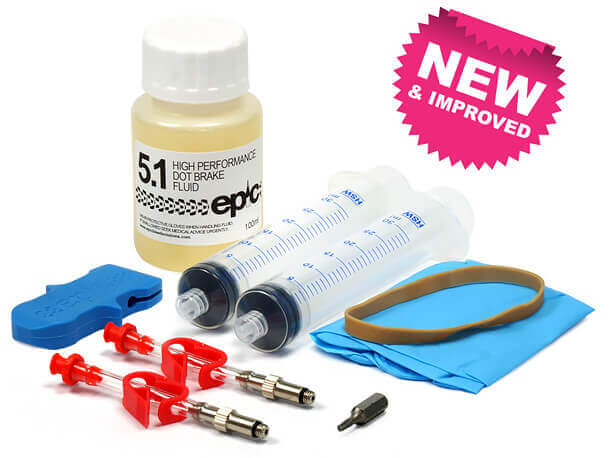
Things you'll need
- Avid Bleed Kit & DOT 5.1 Fluid
- 2.5mm & 5mm Allen wrench
- Bleed Block (supplied with our bleed kit)
- Flat blade screwdriver
- Torx T10 key (supplied with our bleed kit)
- Elastic band (supplied with our bleed kit)
- Paper towels
- Torque wrench (optional)
- Work stand (optional)
- Safety glasses (Recommended)
Prepare your bleed kit
Take one syringe and fill it 1/2 full with DOT brake fluid. Do this by immersing the brass bleed adaptor in DOT fluid and pulling back on the syringe plunger. Be sure that the tube clamp is in the open position.
Fill the other syringe 1/4 full in the same way.
Next, hold the syringe with the brass bleed adaptor pointing up. Cover the tip with paper towel and slowly push the syringe plunger to remove all air from the syringe.
De-gas your brake fluid
De-gas the brake fluid to remove hidden air bubbles from the fluid. This will enable a better bleed.
Hold each syringe with the tip pointed up and close the tube clamp. Now pull on the syringe plunger to create a vacuum.
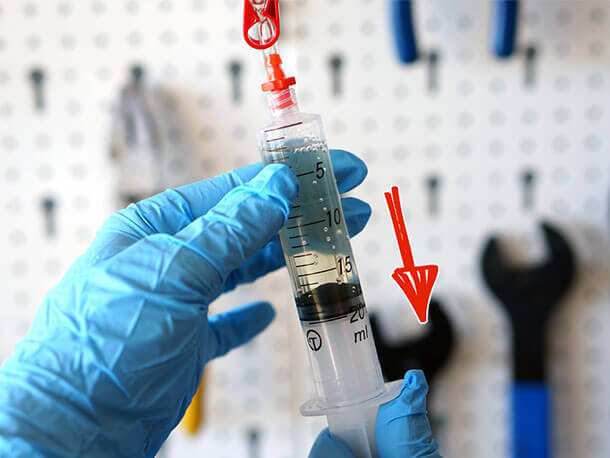
Bubbles will start to appear and grow in size. With the plunger pulled down, tap the sides of the syringe to encourage the air to rise to the top of the syringe. Once the bubbles have stopped rising, open the tube clamp, cover the tip with paper towel and slowly push out the air.
Repeat this process several times to remove as much air as possible. You will not be able to remove all of the air.
Set your kit aside for a minute so you can prepare your brake.
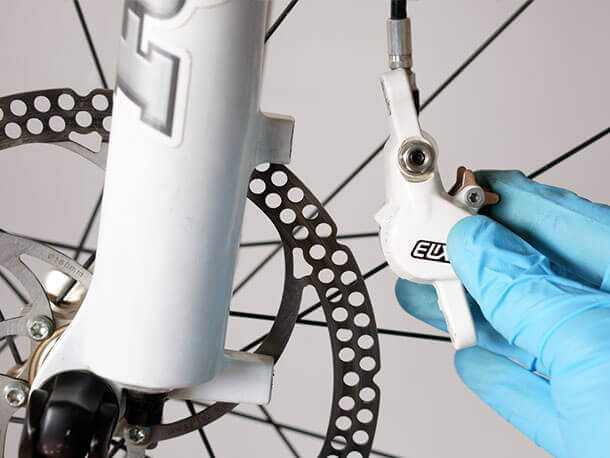
Step 1
If you have access to a work stand go ahead and use it to secure your bike.
Remove the relevant wheel to give you free access to the brake calliper.

If you don't have a work stand handy, it may be easier to remove the calliper from the frame or fork during the bleed. Do this by removing the two calliper fixing bolts using a 5mm Allen wrench and sliding the calliper up and off the brake rotor.
Step 2
Take your flat blade screwdriver and place it between the brake pads.
Without using excess force, use a combination of twisting and levering movements to separate the brake pads. This will push back the pistons into their housings to prevent over-filling the brake system with brake fluid.

| Be careful not to damage the surface of the brake pads. Only use this method if the brake pads are in place. Never contact the piston faces directly as you may damage them. |
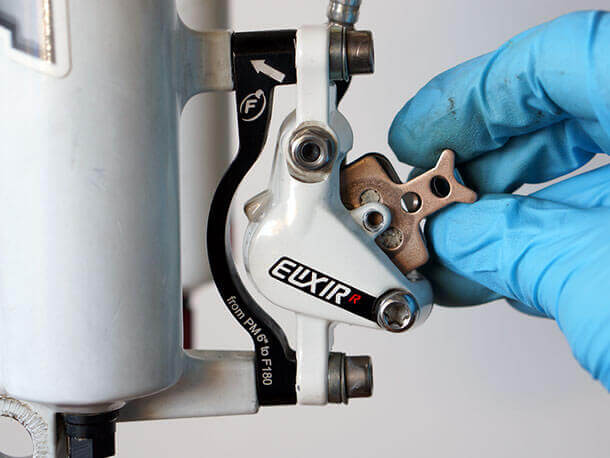
Step 3
Remove the 'C' clip from the brake pad retainer screw, then using your 2.5mm Allen wrench, remove the brake pad retaining screw. Once that's out of the way go ahead and remove the brake pads and spreader clip. Place them somewhere safe away from any brake fluid.

Step 4
Insert your bleed block between the pistons to keep them apart during the bleed procedure.
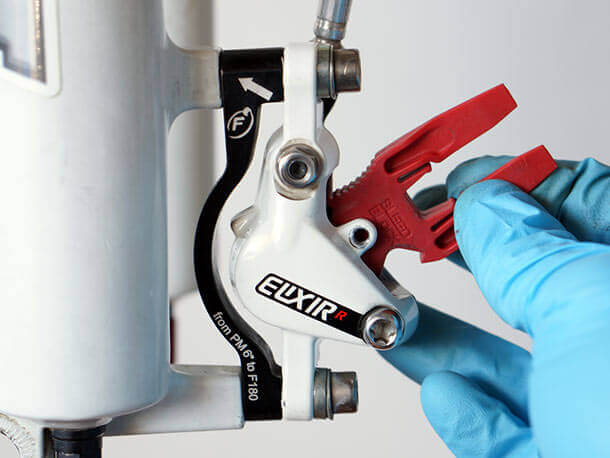
| If you do not have the Avid bleed block or other suitable device, follow our guide on how to make your own bleed block. |
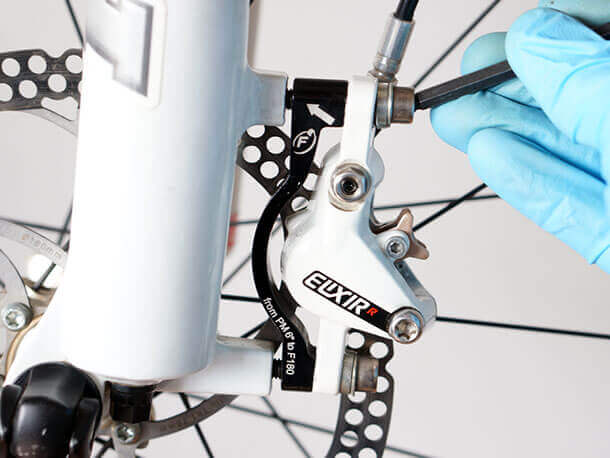
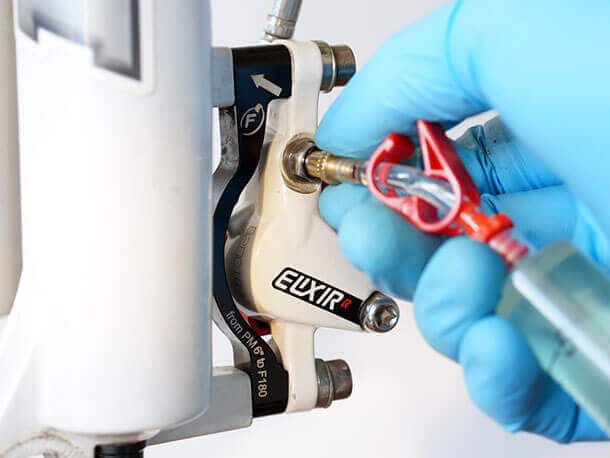
Step 5
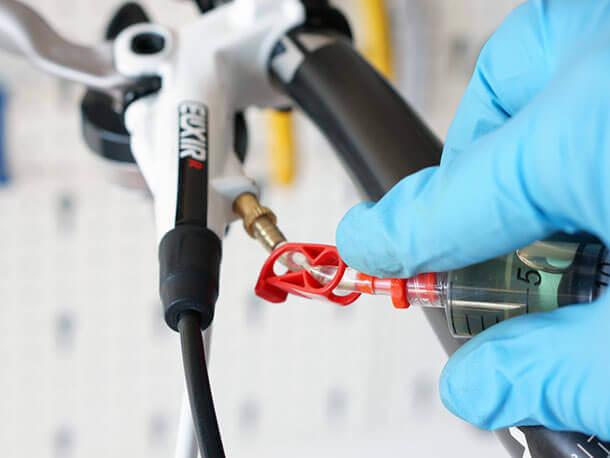
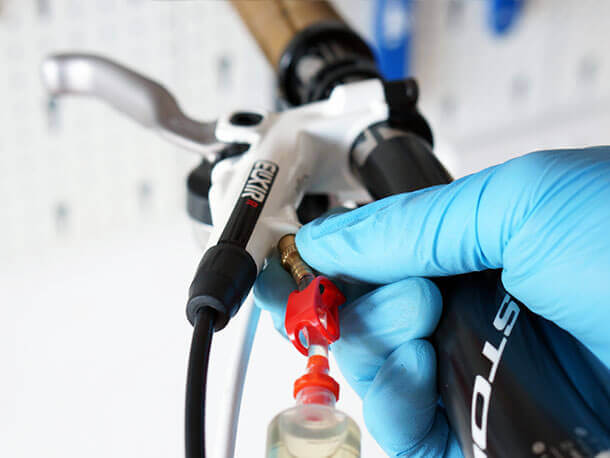
Use your Torx T10 key to remove the bleed port screw from the calliper body or banjo bolt as shown on our Elixir R model.
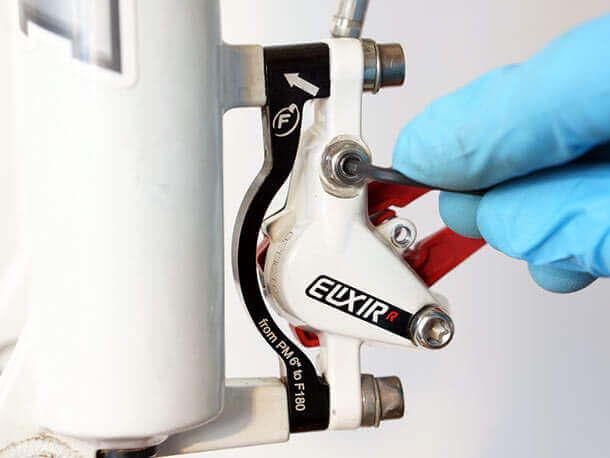
Place the screw in a safe place so it doesn't go walkabout.
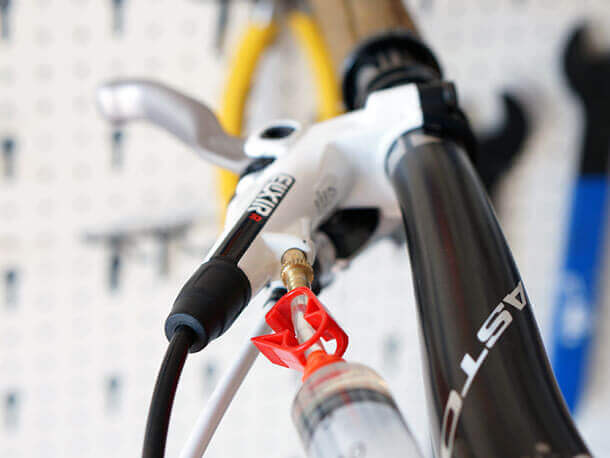
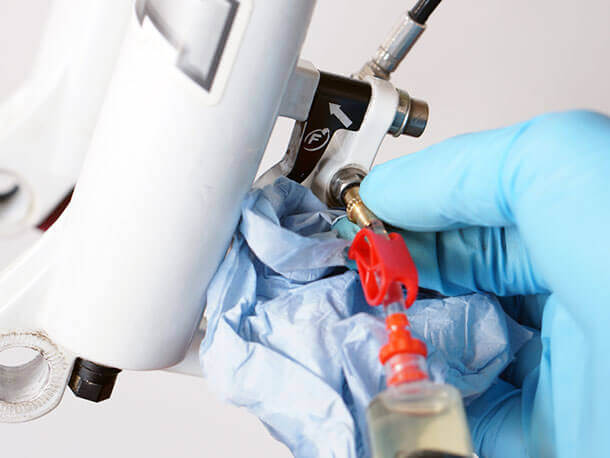
Step 6
Make sure that all air is removed from the 1/2 full syringe and thread the bleed adaptor in to the calliper bleed port until finger right.
| Never use tools to tighten the bleed adaptors. This will deform the o-ring and create an air leak. |
Step 7
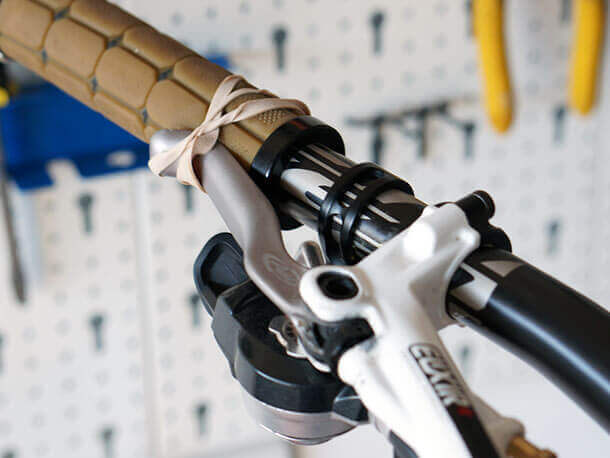
If your lever is fitted with Contact Point Adjustment and a rotating bleed port screw located on the contact point adjuster: rotate the adjuster in the direction opposite the arrow until it stops, then rotate the adjuster back until the bleed port screw it pointing directly up.
If your lever is fitted with Contact Point Adjustment but has a fixed bleed port screw, rotate the adjuster in the direction opposite the arrow until it stops.
Step 8
Use your Torx T10 key to remove the lever bleed port screw. Place it in a safe place.

Then make sure that the 1/4 syringe is air free and thread it into the lever bleed port.
| There is no need to re-position the brake lever on the handlebar during the bleed process. |
Step 9
With both syringes held upright, gently push on the plunger of the calliper syringe to inject brake fluid until there is 2-3mls left in the calliper syringe.
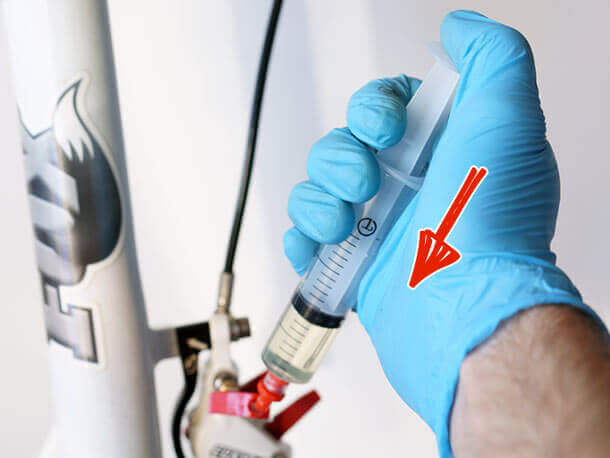
You should see fluid and air bubbles enter the lever syringe.
| Do not inject all of the fluid in the syringe, otherwise air may be reintroduced into the brake system. |
| If the fluid entering the lever syringe is discoloured and dirty looking, this shows that the fluid is very old. We would recommend bleeding the system twice to rid the system of all of the old fluid. |
Step 10
Close the tube clamp on the lever syringe.
Then pull the brake lever all the way to the handlebar and hold in position using an elastic band or strap. Keep the lever in this position until instructed to release in a later step.
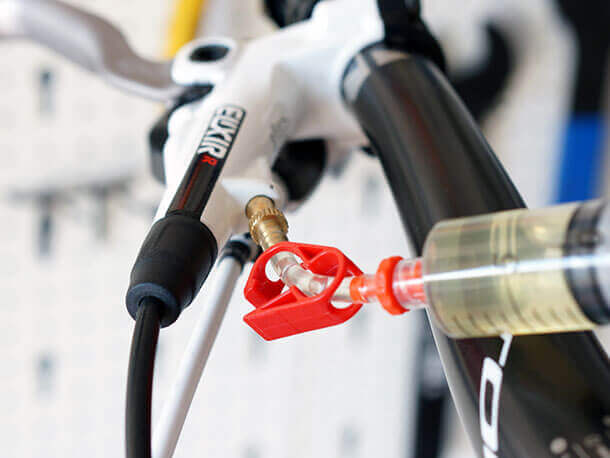
Step 11
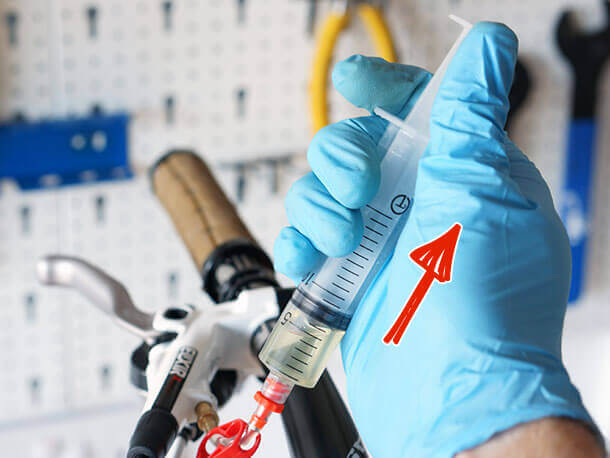
Pull back on the calliper syringe to create a vacuum and hold it there for a few seconds.
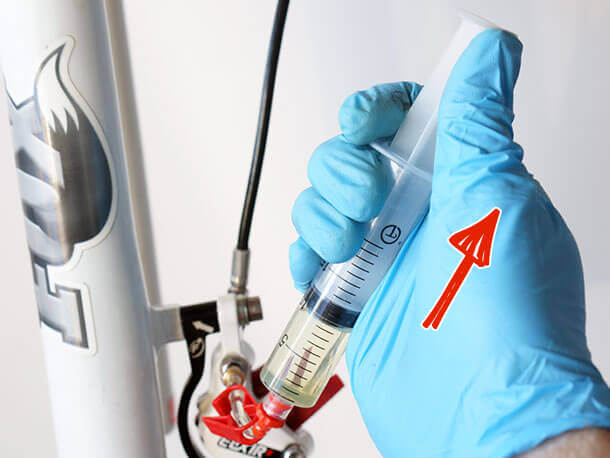
Then push on the plunger and release to pressurise the system.
Do this several times until all air bubbles have stopped coming out of the calliper bleed port. Be sure to hold the syringe upright so as not to reintroduce any air back into the system.
| Do not pull so hard that you accidentally remove the plunger from the syringe. |
| If you are not feeling resistance when pulling back on the syringe plunger and a vacuum is not being created, check that your syringe connections are secure and that the bleed adaptor is not over tight in the bleed port. |
Step 12
Once the air bubbles have stopped entering the calliper syringe, remove the elastic band from the brake lever but keep the lever pulled back with your finger.
Now gently push on the calliper syringe plunger and while doing so allow the pressure to slowly extend the brake lever to its natural position.
Step 13
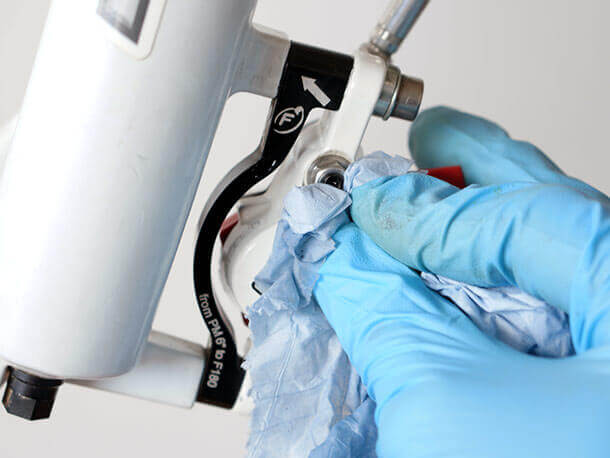
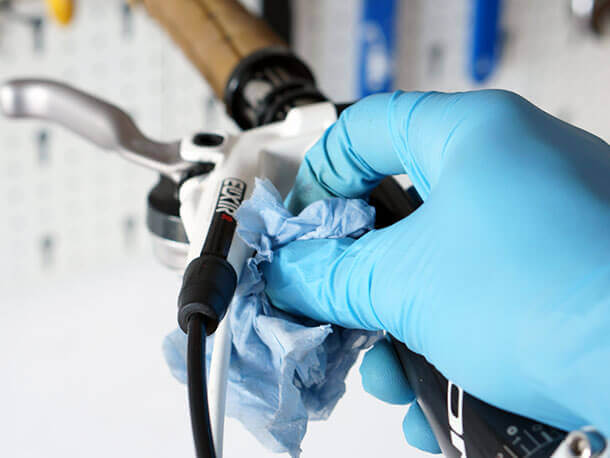
Close the clamp on the calliper syringe, then remove the syringe from the bleed port and reinstall the calliper bleed port screw.
Wipe away any excess brake fluid from the calliper with a wet cloth.
Step 14
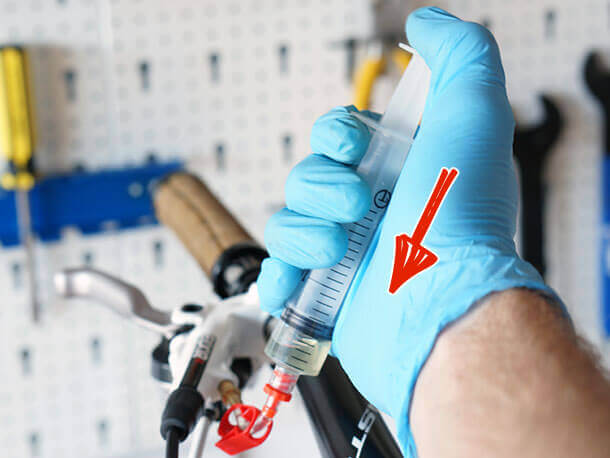
Open the clamp on the lever syringe and pull back on the syringe plunger to create a vacuum, then gently push and release the plunger to pressurise the system.
| Do not pull so hard that you accidentally remove the plunger from the syringe. |
While doing this, squeeze the brake lever and allow it to snap back to its natural position several times. This will help dislodge any trapped air.
Repeat this process several times until air bubbles stop entering the lever syringe.
Step 15
Once all air bubbles have stopped entering the lever syringe, apply a small amount of pressure on the syringe plunger to pressurise the system and then release.
Remove the syringe assembly from the bleed port and reinstall the bleed port screw. Wipe away any excess brake fluid with a wet cloth.
Step 16
Remove the bleed block from between the calliper pistons and reinstall the brake pads, making sure that the pad retaining pin and spreader clip are fitted correctly.
Step 17
Go ahead and re-fit the wheel to the bike. If you removed your calliper during the bleed procedure then re-fit that to the frame using the two fixing bolts.
Step 18
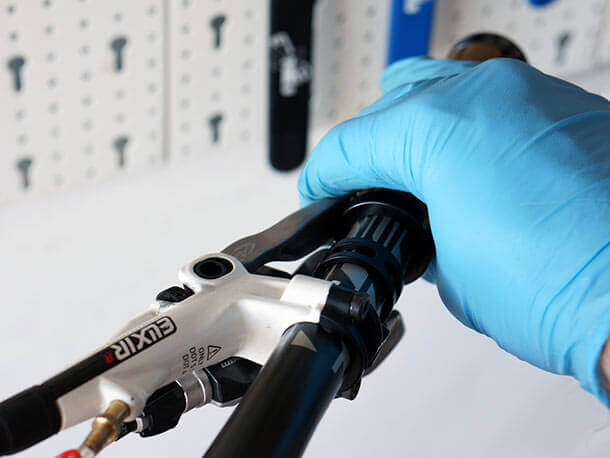
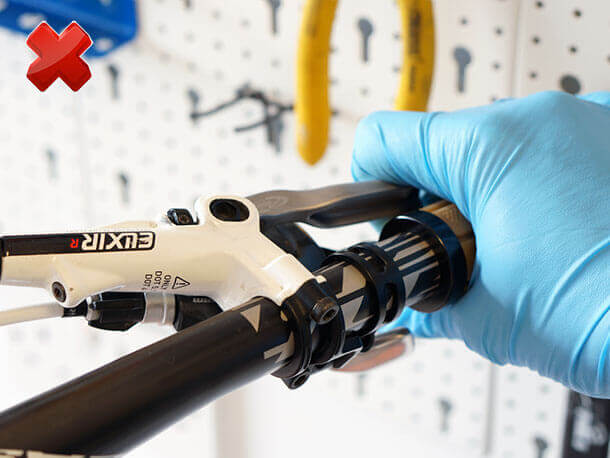
Once you've got the wheel back on, give the brake lever a good few pulls to set the pads against the rotor.
Don't worry if the lever pulls back to the bar on the first couple of throws, it's just the pistons resetting the pads against the rotor.
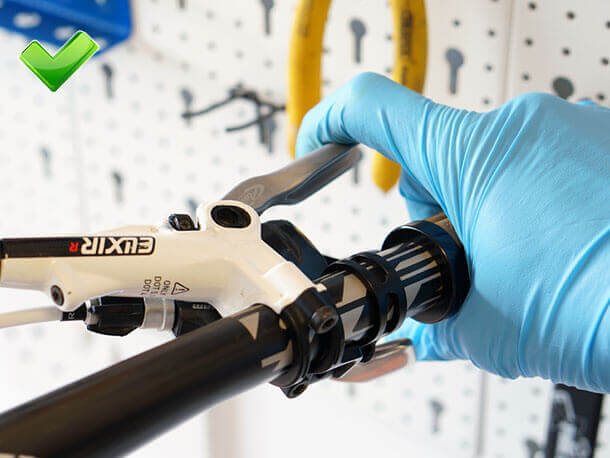
Once the pads are set the lever should feel nice and firm (see pic). If the lever continues to feel poor after several attempts it probably means there is still air within the system and the bleed procedure will need to be repeated.
Step 19
Now you should have a nice firm lever. Pull on the lever once more and hold it at the biting point with normal braking force.
Visually inspect both your lever and calliper for signs of fluid, paying close attention to the bleed port screws.
If you do see brake fluid, make sure that the bleed port screws are tight enough, wipe away any fluid with a wet cloth and repeat the test.
Once you're happy that there are no signs of brake fluid you're ready to ride.
| Always dispose of used fluid in a responsible manner. Consult your local council website for guidelines and to find your nearest brake fluid recycling centre. |
So have you followed this guide with success? Do you have any tips of your own on how to make the bleed procedure easier or faster? Leave us a comment below.


