

5 Mistakes to Avoid when Bleeding Your Mountain Bike Brakes
5 Mistakes to Avoid when Bleeding Your Mountain Bike Brakes
If there's one thing better than learning from your mistakes, it's learning from somebody else's mistakes and when it comes to bleeding mountain bike brakes there are a few mistakes which crop up time and again.
Although brake bleeding is considered a pretty simple process by many, getting it wrong can at the very least ruin your riding plans. Worse still it can cause serious damage to your brakes resulting in longer periods off the trails.
If you're a novice considering bleeding your brakes for the first time use these five tips to get a head start and save yourself a bit of potential embarrassment amongst your riding buddies.
For the rest of you it will serve as a bit of a reminder about what not to do when bleeding your brakes. After all everybody makes mistakes, right?
#1 Brake Pad/Rotor Contamination
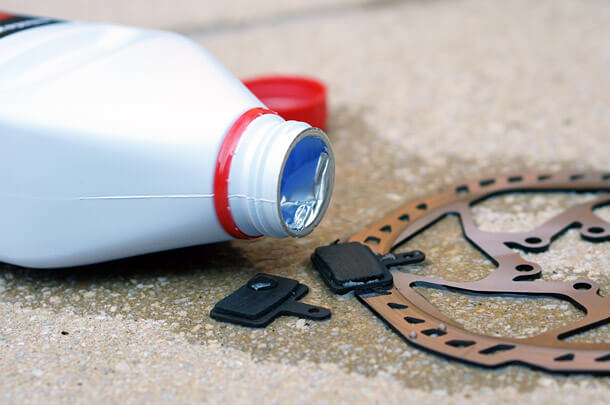
This has got to be far and away the most common mistake made during brake bleeding.
I too have been caught wondering why my brakes feel like crap following what seemed like a decent bleed. The problem was of course brake fluid on the pads.
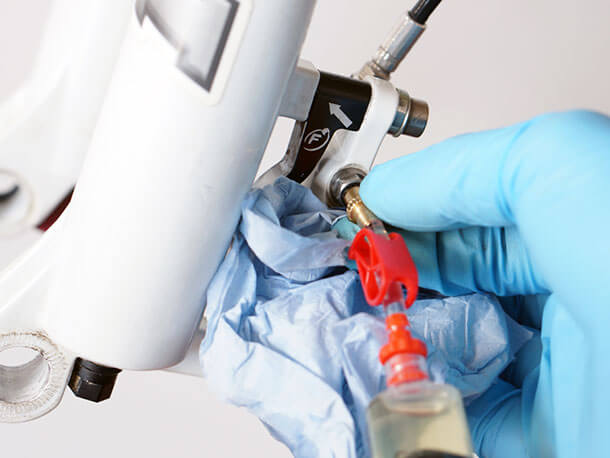
Brake fluid spillages from an open reservoir bath, or over-spray from a syringe disconnection while filling the brake system can render your brake pads useless.
Unless you've had an obvious spillage the first sign of pad/rotor contamination is usually when you start riding again.
Classic symptoms would include a firm brake lever (as you have already removed the air from the system) but terrible stopping performance since there will be lack of friction between the pads and rotor due to the brake fluid acting as a lubricant. Oh and usually one hell of a loud, juddering squeal under braking.
How to Avoid:
The problem is easily avoidable by removing the wheel and brake pads before starting the bleed process.
By removing the wheel and brake pads and using a bleed block instead, you'll not only keep your brake pads free from destructive brake fluid, you'll also avoid over filling the brake system with brake fluid too (see #5).
#2 Using the Wrong Brake Fluid
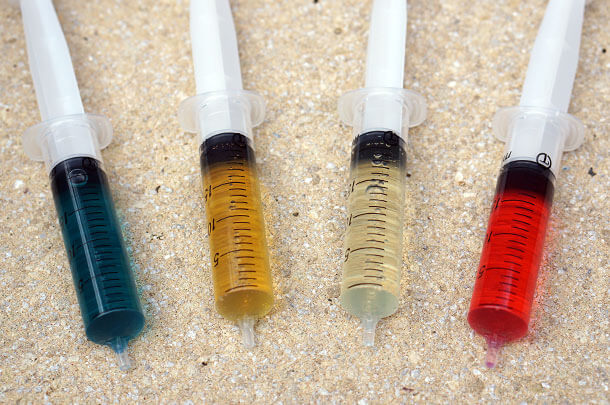
There are two types of brake fluid used in mountain bike brakes today. DOT fluid and mineral oil.
Which one you use is not up for discussion, you should only use the fluid your brake was designed to use.
Introducing the wrong fluid into your brake will have adverse effects on your brakes performance. Problems will include but are not limited to:
- Changes in brake 'feel' and characteristic. e.g. brake may become sluggish and less responsive.
- Damage to internal seals through corrosion and/or swelling.
- Separation and pooling of brake fluid inside brake lines due to DOT fluid/Mineral oil incompatibility.
How to Avoid:
Be clear before you start the bleed process which brake fluid your brake requires.
As brake manufacturers tend to stick to one or the other, the table below can be used as a reference to find out which brake fluid you should use.
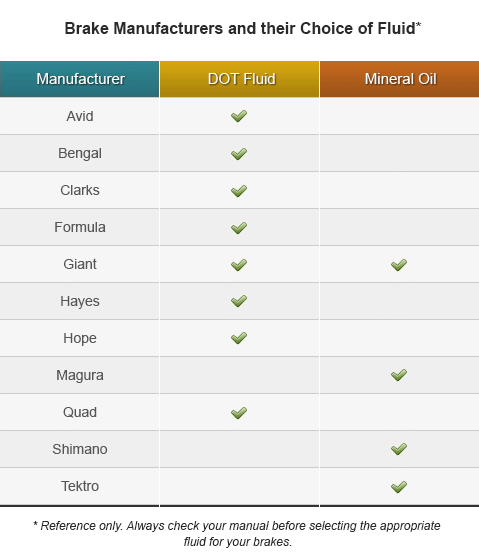
| This table should be used as a reference only. Some manufacturers use both types of fluid in their range of brakes so double check before you begin the bleed process. |
| The brake fluid type can usually be found written on the master cylinder or brake lever assembly, commonly placed on the reservoir cap or around the bleed port screw. |
#3 Using Brake Fluid from an Old Container
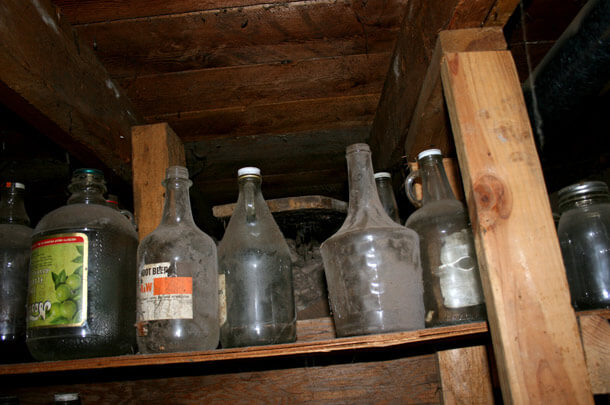
Although using old brake fluid isn't as bad as using the wrong type of fluid in your brake, it's not the most helpful either.
DOT fluid, unlike mineral oil, is hygroscopic, meaning it will absorb water from the environment, even at normal atmospheric pressure. This water content is a problem for two reasons.
- Any water content will reduce the boiling temperature of the brake fluid. This affects the performance of the fluid after heavy braking periods, causing fluid fade to occur earlier compared to fresh fluid.
- Water content will eventually cause corrosion of the internal parts of the brake if left for long periods of time.
Two very good reasons for purging the system of old DOT brake fluid annually.
So when does brake fluid become old?
Good question, and the answer will change depending on who you ask.
The safest approach is to use DOT fluid only from sealed containers, and always replace the cap immediately after you've taken out what you need. Brake fluid in larger containers (500ml-1L) which has been hanging around in your garage for over 6 months are best avoided.
How to Avoid:
Keeping several smaller bottles is far better than buying a large container and keeping it for several years. The fluid in the larger container will start to deteriorate after opening it for the first time, whereas you can open several smaller containers as you need them knowing that the fluid is fresh.
#4 Over-tightening Bleed Adaptors and Fittings
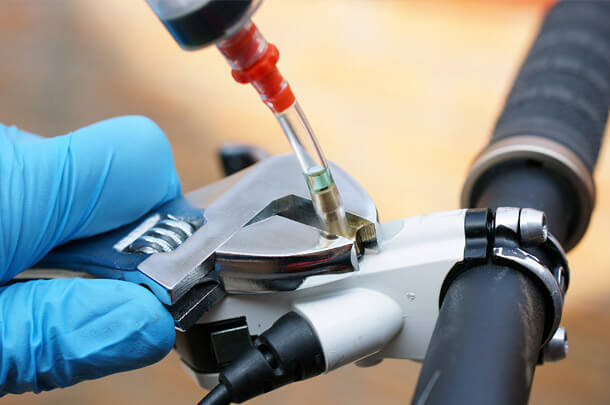
Since the only thing allowing you to create an air tight seal between the bleed kit and the bleed port is often a small rubber o-ring, it's not surprising how easily they can be damaged by over tightening.
Over tightening bleed kit fittings is the main reason why some folk struggle to get a good seal when bleeding brakes.
Applying too much pressure to bleed fittings can crush, stretch or deform the o-ring making it impossible to maintain the essential air tight seal between the bleed kit and your brake.
How to Avoid:
Less is more when connecting bleed fittings. Tighten until finger tight and never use tools.
If you struggle to achieve a good seal it might help to untighten the fitting slightly to release the pressure on the rubber o-ring.
#5 Over-filling the Brake System
Over-filling the brake system with brake fluid happens when the brake is bled without resetting the position of the calliper pistons beforehand.
The most common example of why this would happen is if the system is bled with part worn brake pads in situ.
As brake pads wear the calliper pistons advance outwards to compensate. This keeps the pads close to the rotor resulting in a consistent brake lever feel and bite point.
Over filling the system with brake fluid can make replacing the brake pads an impossible task. The extra fluid in the brake system will prevent you from pushing the pistons back into their reset position - a necessary step creating the necessary space to accommodate the new brake pads.
How to Avoid:
To avoid this problem remove your brake pads, fully push back the pistons and insert a bleed block between the pistons to keep them there. This will ensure that the correct amount of brake fluid is left in the brake system during and after the bleed process.
If you suspect that your brake is over filled you will need to remove the excess brake fluid.
Always vent out excess brake fluid from the highest point in the brake system - the lever. This will stop air entering the system.
Simply loosen the lever bleed port screw or reservoir top cap and push back the calliper pistons to their fully reset position. This will evacuate the excess brake fluid leaving behind the correct amount.
How about you?
So there's my top five tips on what not do do when bleeding your mountain bike brakes.
How about you? Have you ran into trouble during the bleed process? How did you get out of trouble? Share your problems with us in the comments below.


