

5 Minute Shimano Mini Bleed
5 Minute Shimano Mini Bleed
If you've ever struggled to get a firm feeling lever following a seemingly flawless Shimano brake bleed then this article is for you. Today we'll walk you through how to perform a quick, 5 minute mini bleed of your Shimano brakes in order to eradicate excess lever travel and help restore faith in your stoppers.
You're not the only one who knows what it feels like to be haunted by excess lever throw. Our inbox is forever filled with requests from riders asking for tips and tricks on how to improve the feel of their Shimano brake levers. Solutions such as pumping out the calliper pistons prior to bleeding and using a slimmer bleed block have been suggested in the past, but we feel the 5 minute mini bleed yields the best and most consistent results.
This technique can be performed following a full bleed of the brake system or as a standalone procedure, even right before a ride, when you simply don't have the time to spend nursing your brakes back to full health.

The mini bleed should be carried out when the brake is fully assembled on the bike with the wheel and pads fitted. This is because the calliper pistons will have already adjusted themselves and set the pads against the rotor, compensating for any dead space. This is why the first few throws of the brake lever always feel spongy following a full bleed of the brake system.
So How Does it Work?
The mini bleed works by essentially over-filling the system with brake fluid. As your brake pads wear the calliper pistons move outwards to compensate for the reduction in pad material. This creates space inside the brake system for additional brake fluid.
By adding extra brake fluid the point at which the pads contact the rotor happens much sooner in the lever stroke giving you great feeling brakes.
What's the Catch?
There's only one and it's pretty small. As you've previously over-filled the system with fluid you will find it difficult, if not impossible, to push back the calliper pistons to make enough space to accommodate those shiny new brake pads.
Luckily the solution is simple. By removing the lever bleed port screw the pistons will push back easily as the extra fluid can now escape - this means you'll want to catch the over-spill with a paper towel or similar. More on that here.
So those are the preliminaries, now let's get into it!
Things you'll need:
- Shimano Bleed Kit or Shimano Funnel
- 2.5mm hex key
- 4mm hex key
- Paper towel or clean rag
- Mineral oil brake fluid
- Protective gloves
A work stand can make things easier but isn't essential, we're using one to assist with making this guide.
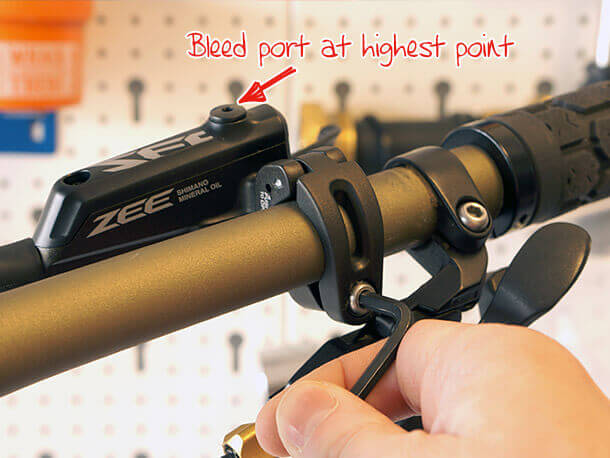
Step 1
Start by loosening the fixing bolt at the handlebar and rotate the lever assembly so that the bleed port is at the highest point. Temporarily fix the lever assembly in this position. If you're using a work stand, leaning the handlebars one way or the other will help in achieving this position.
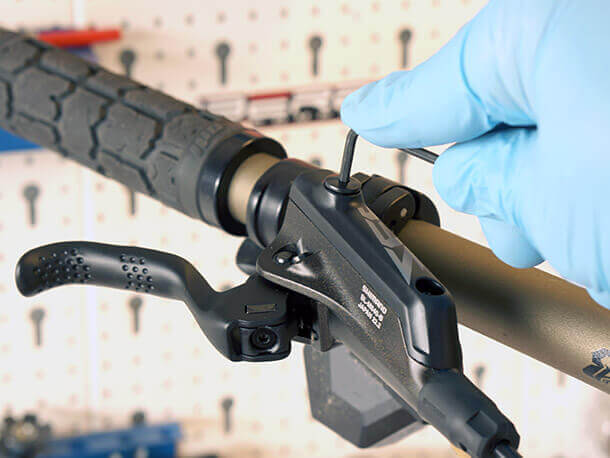
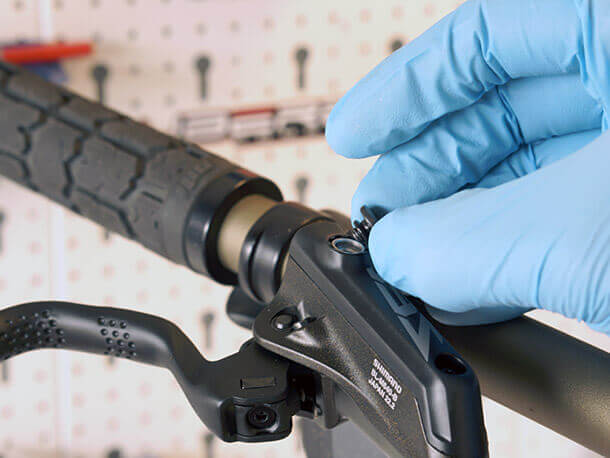
Step 2
Use your 2.5mm hex key to remove the lever bleed port screw and rubber o-ring - sometimes they come out together, sometimes they don't. If the o-ring remains inside the bleed port use the end of your 2.5mm hex key to fish it out. Set these down somewhere safe.

Do not operate the brake lever at this time. Air may enter the brake system or fluid may be lost as a result.
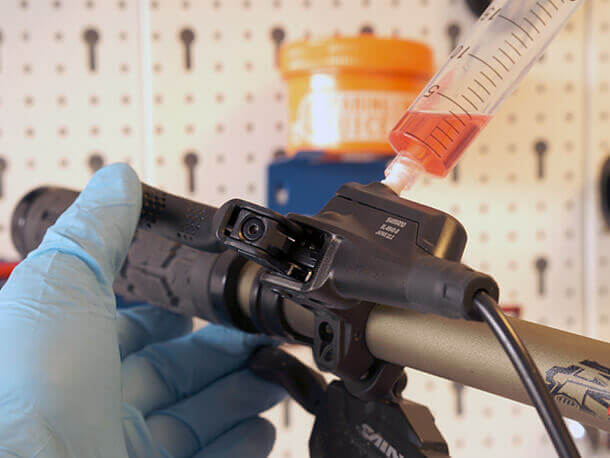
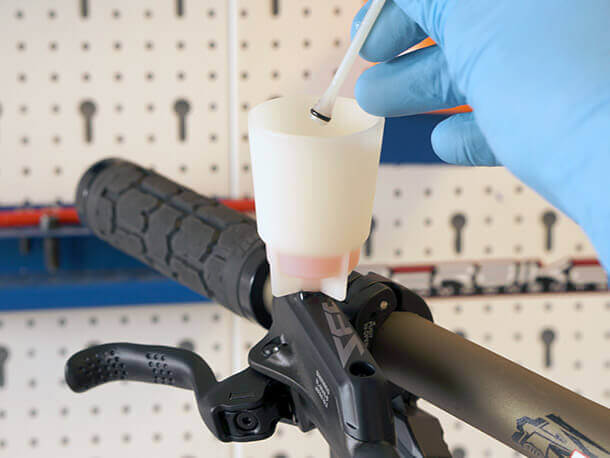
Step 3
Take the lever syringe from your Epic Shimano bleed kit, or the Shimano bleed funnel, and thread it into the bleed port until finger tight. If you're using our bleed kit be sure to remove the plunger from the syringe before connecting it. If you're using the funnel remove the stopper and set aside.

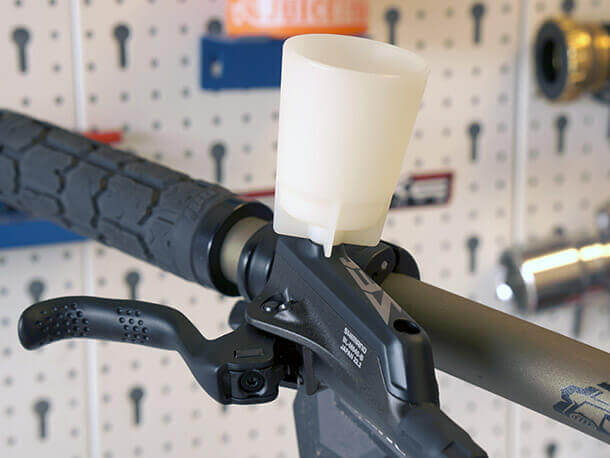
Step 4
Add mineral oil brake fluid into the syringe/funnel, enough to generously cover the bottom to ensure no air can enter the system from above. 5ml should be plenty if you're using our bleed kit.
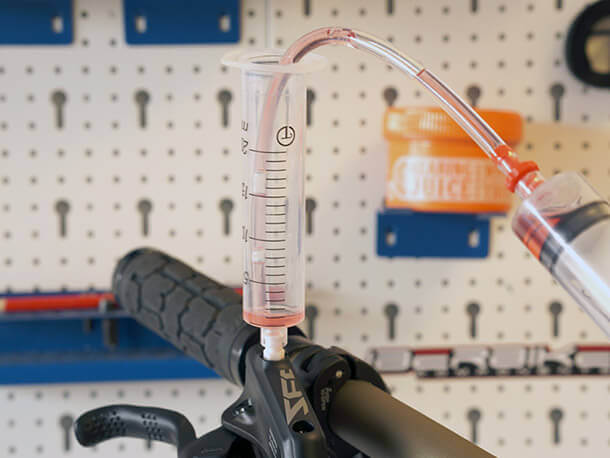
This will act as a temporary brake fluid reservoir. As air bubbles are released during the next step the fluid will gravitate back into the system filling any available spaces.
Step 5
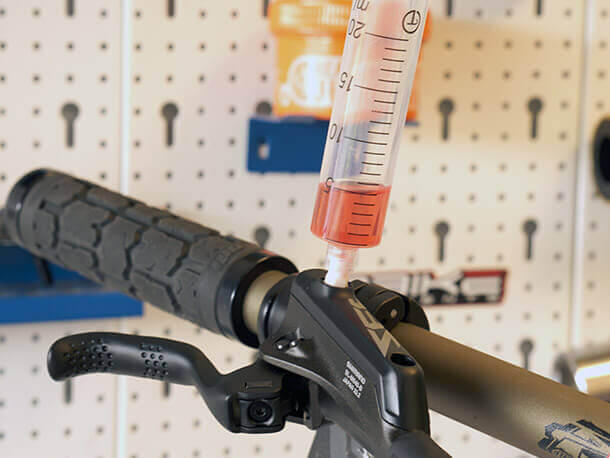
Double check the position of your brake lever assembly to make sure that the bleed port is still at the highest point possible - turn your handlebar slightly if needed.
Now the fun part, start 'flicking' the brake lever. By this we mean squeezing the brake lever firmly, as you would under normal riding conditions, and then allowing the lever to snap back to its resting position. Do this until you can see no more air bubbles leaving the bleed port.

Step 6
By this point you should have noticed some improvement in how your brake lever feels as you should have managed to dislodge some air, but we're not done just yet.
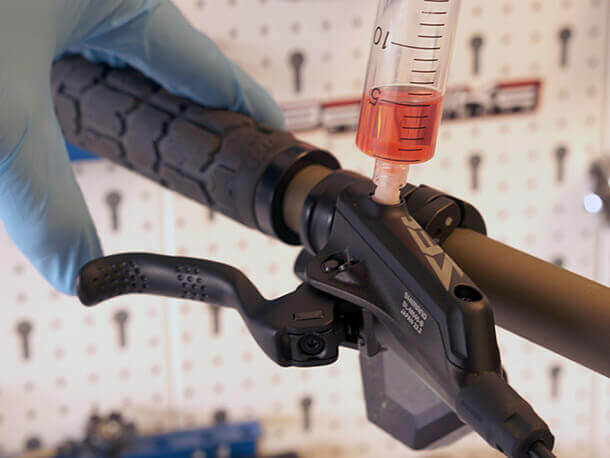
Loosen the fixing bolt once more and rotate the lever assembly so that it is tilted roughly 45 degrees downward towards the ground. Flicking the brake lever whilst in this position will help to dislodge any air bubbles which may be trapped.
Now rotate the lever assembly so that it is roughly 45 degrees upwards and repeat.
Continue to flick the lever whilst rotating the lever assembly forwards and backwards. This will help to encourage any trapped air to the top of the system and out of the bleed port. Turning the handlebars from side to side will help at this stage.
Be mindful of the fluid level inside the syringe/funnel as you rotate the lever assembly. If there is too little fluid inside to cover the bottom as it is tilted air may enter the brake system. Top up with additional mineral oil if needed.
Step 7
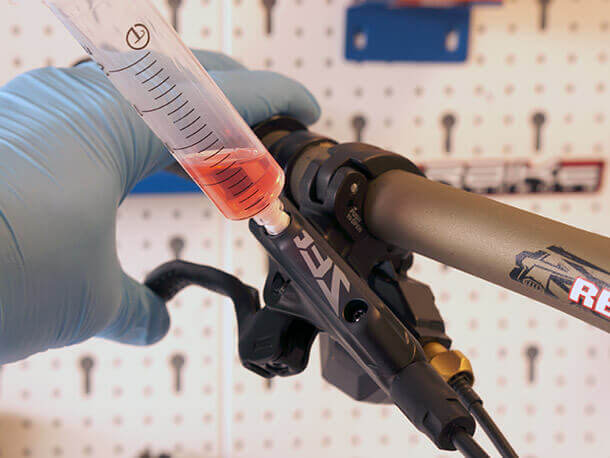
So now that you've given your index finger a thorough workout and as long as there's no evidence of any more air bubbles emerging from the bleed port, it's time to put things back together.
Rotate the lever assembly on the handlebar so that the bleed port is at the highest point once again. Temporarily tighten the fixing bolt to ensure it stays in this position.
If you're using the Shimano funnel grab the stopper and use it to plug the hole in the centre.
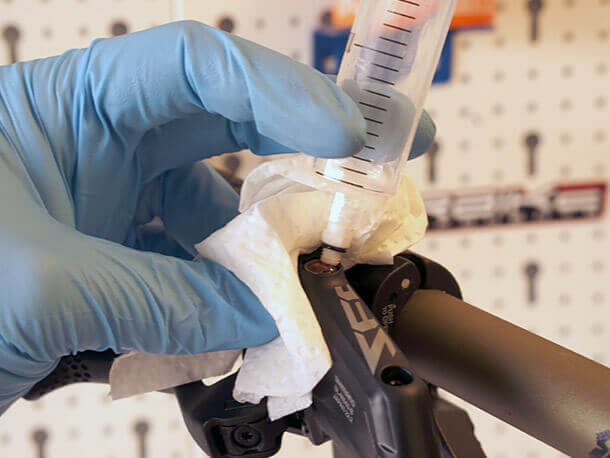
If you're using our bleed kit (of course you are!) then depending on how much oil is left in the syringe you may find it easier to draw the fluid out with the injection syringe included in the bleed kit - it's less messy this way.
Now take some paper towel and surround the bleed port as you begin to unscrew the syringe or funnel, being careful not to spill any mineral oil which may drop down onto your calliper or rotor. The last thing we need right now is contaminated brake pads.
Step 8
Next go ahead and refit the bleed port screw and rubber o-ring. Then rotate the lever assembly on the handlebar to your preferred riding position and fix in position using your 4mm hex key.

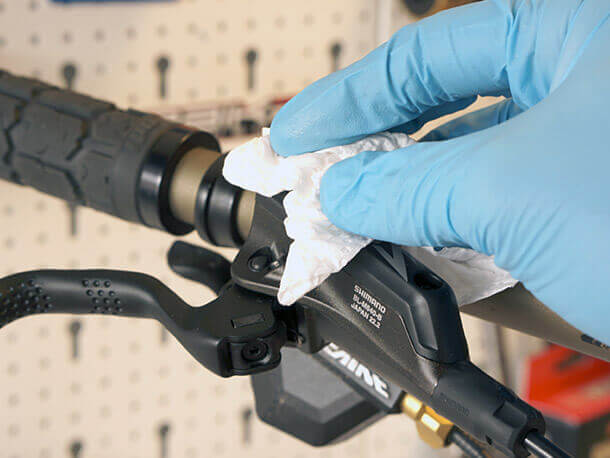
Be sure to wipe away any mineral oil from your lever assembly or paintwork using a wet rag or similar. Be sure to grab a fist full of brake and check your lever assembly and bleed port for any sign of a leak before riding off.
Wrap Up
Hopefully by now you should have noticed an improvement in how firm your brake lever feels. If this procedure hasn't helped at all then you may want to move on to a full bleed of the brake system as you may have air trapped inside your brake calliper which this guide is not intended to fix.
If you've used this guide with success or have anything to add please let us know by leaving a comment below. It would be great to hear from you!


